Installing Xubuntu 24.04 workstation
Table of Contents
- Installing Xubuntu
- Updating after installation
- Adding additional repositories and closed source drivers
- Additional languages support installation
- Using LibreOffice office software
Installing Xubuntu
- If you are not sure about WiFi working during installation, use an Ethernet (cable) network!
If WiFi does not work during installation, you will need to install additional drivers, as described below. For a physical computer
- Insert the installation USB flash drive into the computer and reboot it
- Press Esc or one of the F9..F10 keys (if necessary, look for it for your specific hardware) to activate the boot device menu
- Select boot from USB flash drive
or
- For a virtual computer
- Point the installation file, for example xubuntu-24.04.3-desktop-amd64.iso, to the CD/DVD drive and run it
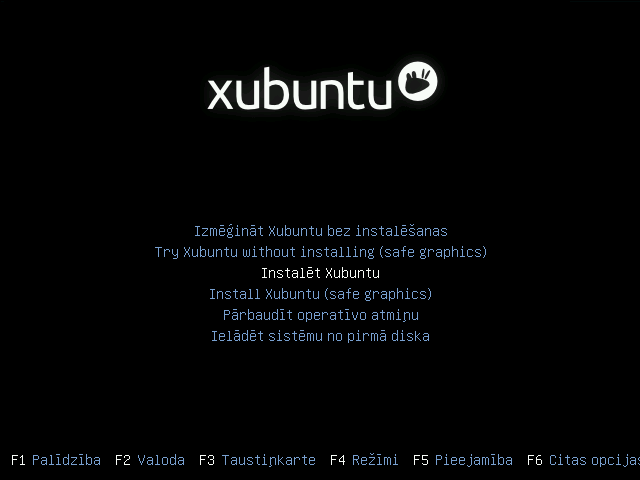
When the following window appears, make sure that the Try or Install Xubuntu menu is highlighted (if necessary, select it with the arrow keys) and press the enter key

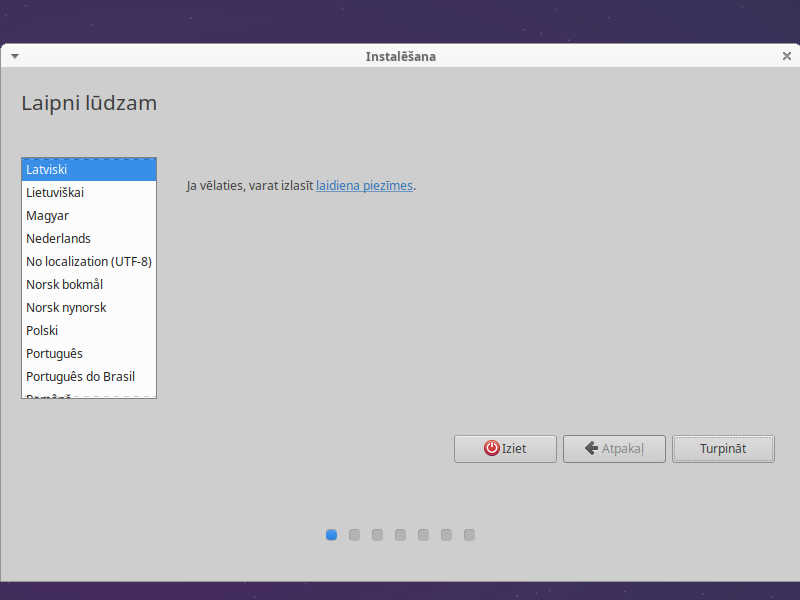
- When the following window opens, double-click the Install Xubuntu 24.04... LTS icon
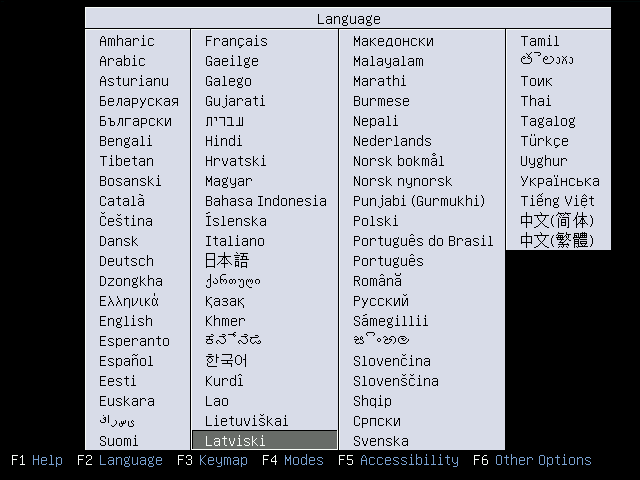
- Select English language and press Next
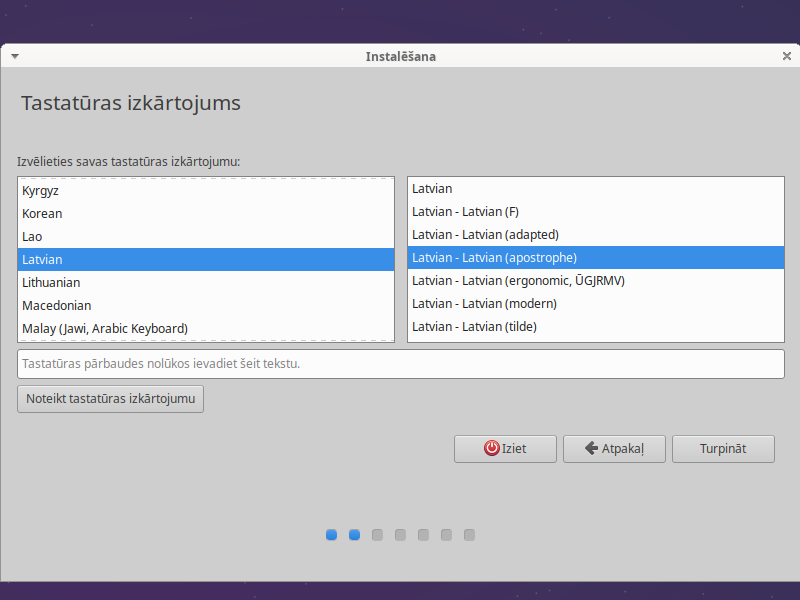
- Select English keyboard layout
- If you use a wired network, press Next, if necessary, select another network type
- If you do not want to download and use the latest installation wizard, press Skip
- Select Interactive installation and press Next
- Select Xubuntu Desktop and press Next

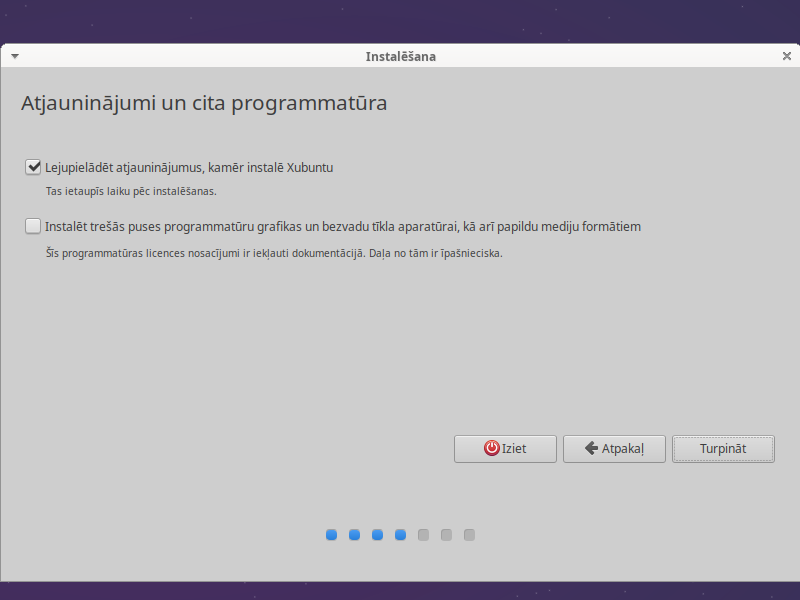
- Check Install third-party software... and Download and Install Support for ... Media formats and press Next
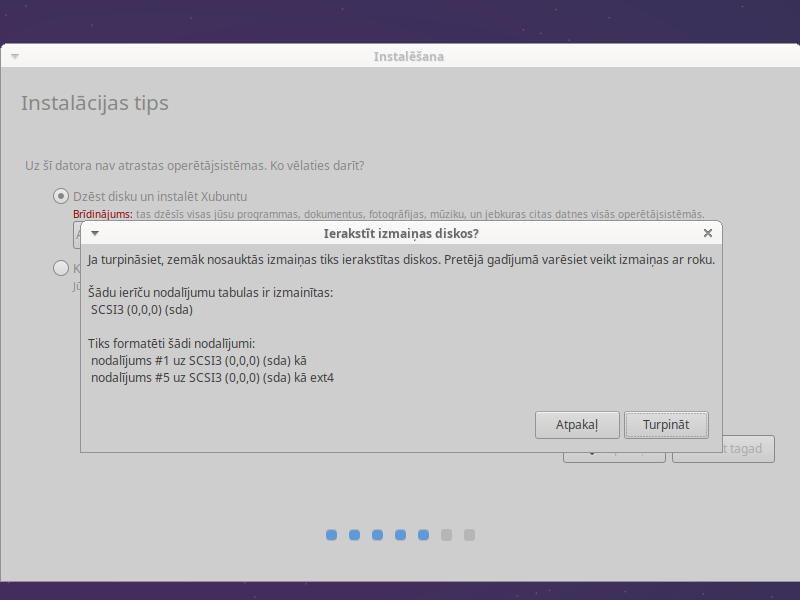
Check Erase disk and install Xubuntu and press Next
- In the Create your account window, enter:
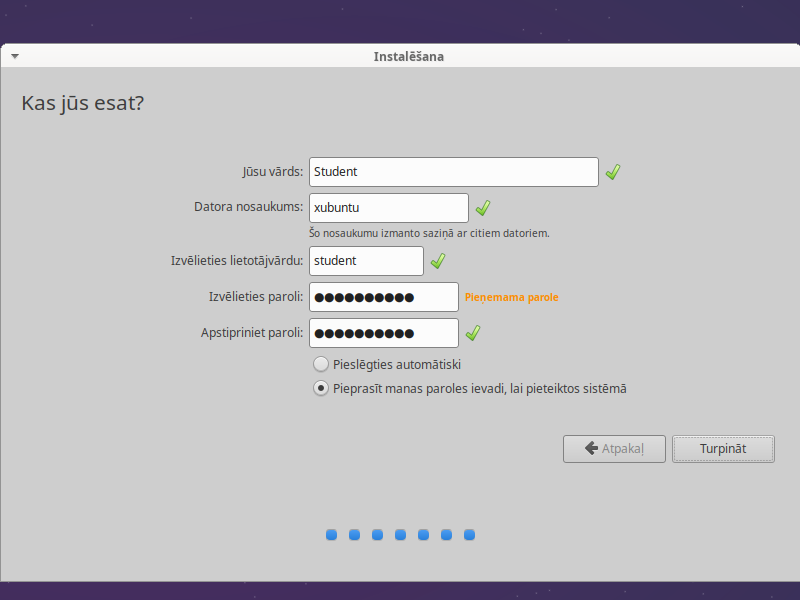
- Your name: Student (usually full name and surname with all soft and long letters)
- Your computer's name: xubuntu (standard lowercase Latin letters and hyphen)
- Your username: student (standard lowercase Latin letters)
- Password: Student007 (any letters, uppercase/lowercase are distinguished)
- Confirm password: Student007
- Leave Require my password to log in selected
- Press the Next button
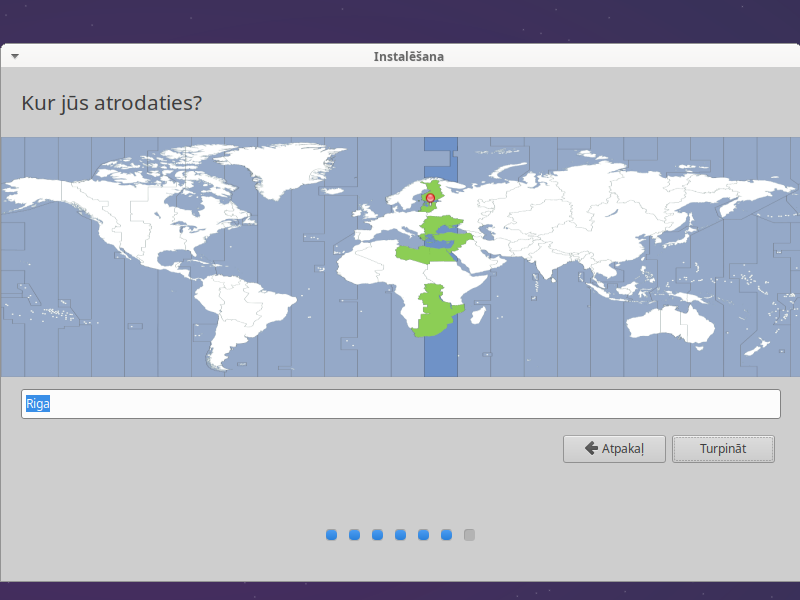
- Select Location Riga and Timezone Europe/Riga and press Next

- Review the installation settings and press Next
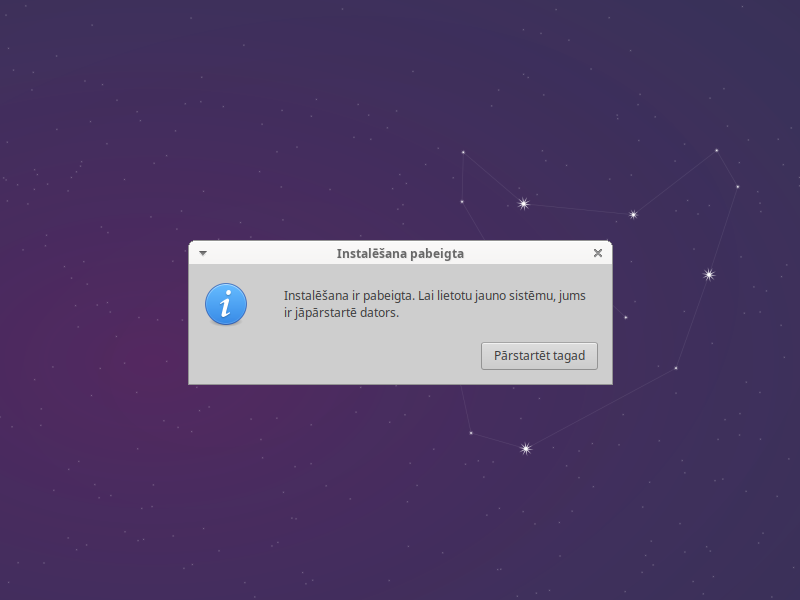
- Wait until the installation is complete Xubuntu operating system installation process.
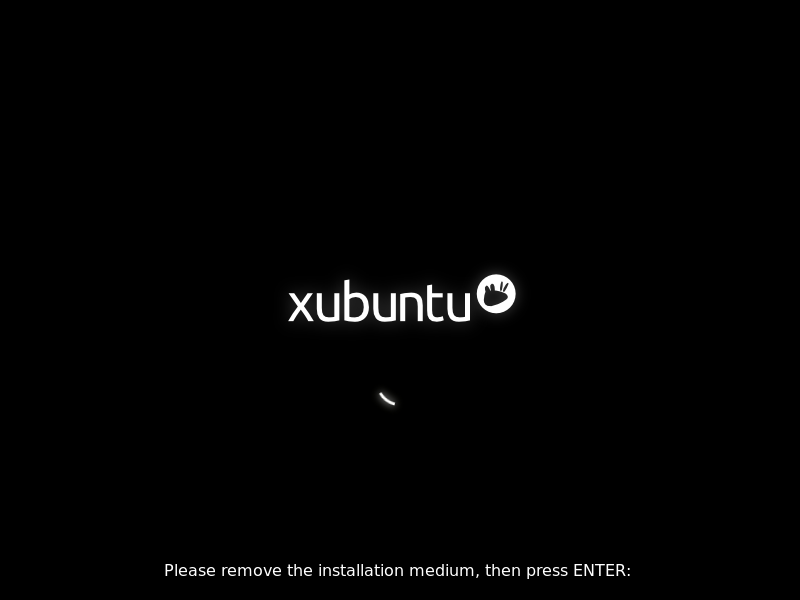
- When the installation is complete, click the Restart now button, and remove the USB flash drive
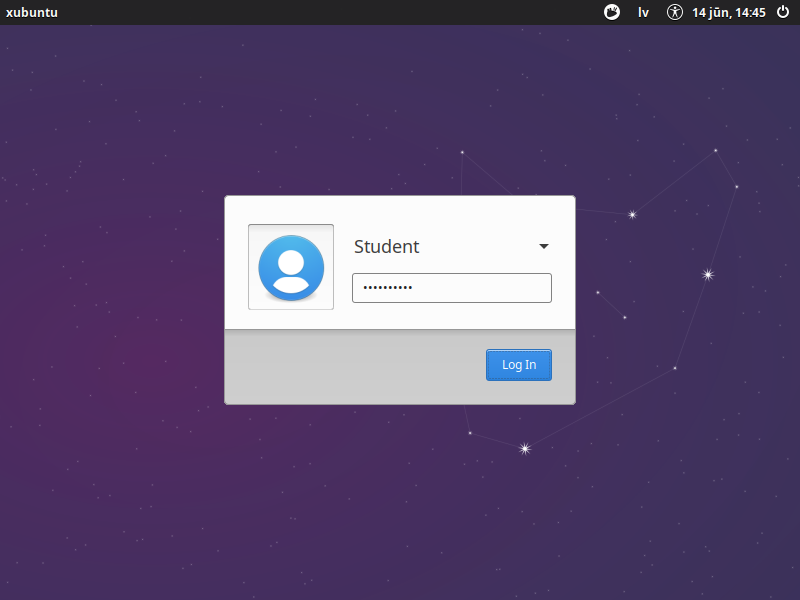
- Wait until the computer reboots, select the user student in the login window, enter the password and click the Login button
Updating after installation
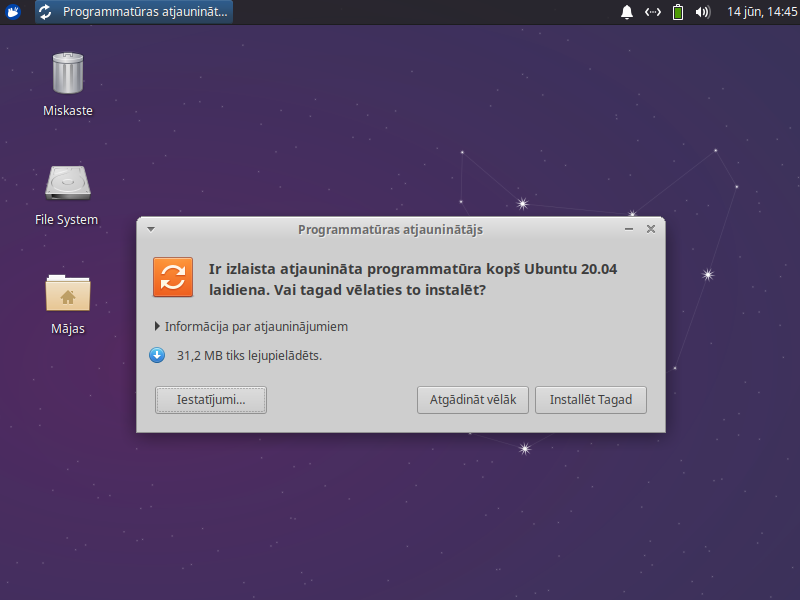
- If the Software Updater window appears when the Xubuntu desktop opens, click the Install Now button:
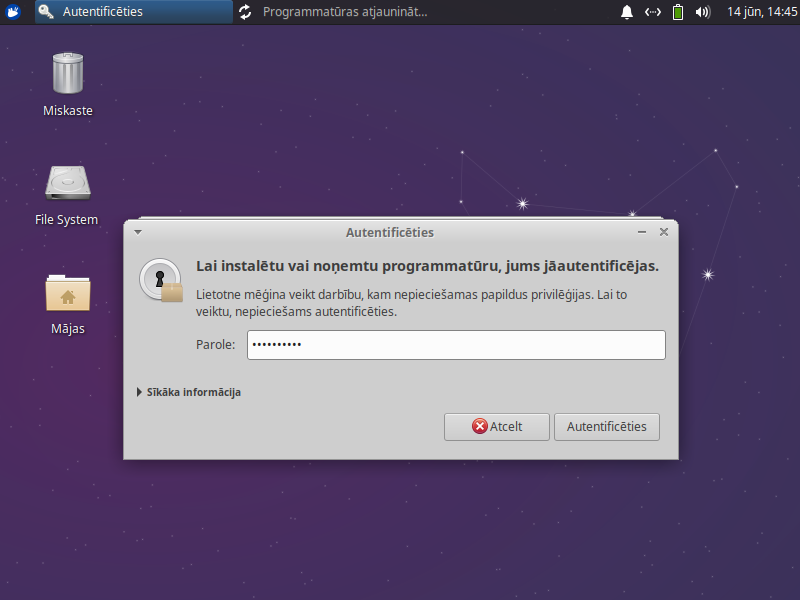
- Enter your password and click the Authenticate button

- If the Your computer must be restarted to finish installing updates window appears after the settings are applied, click the Restart Now button, otherwise click OK
Adding additional repositories and closed source drivers
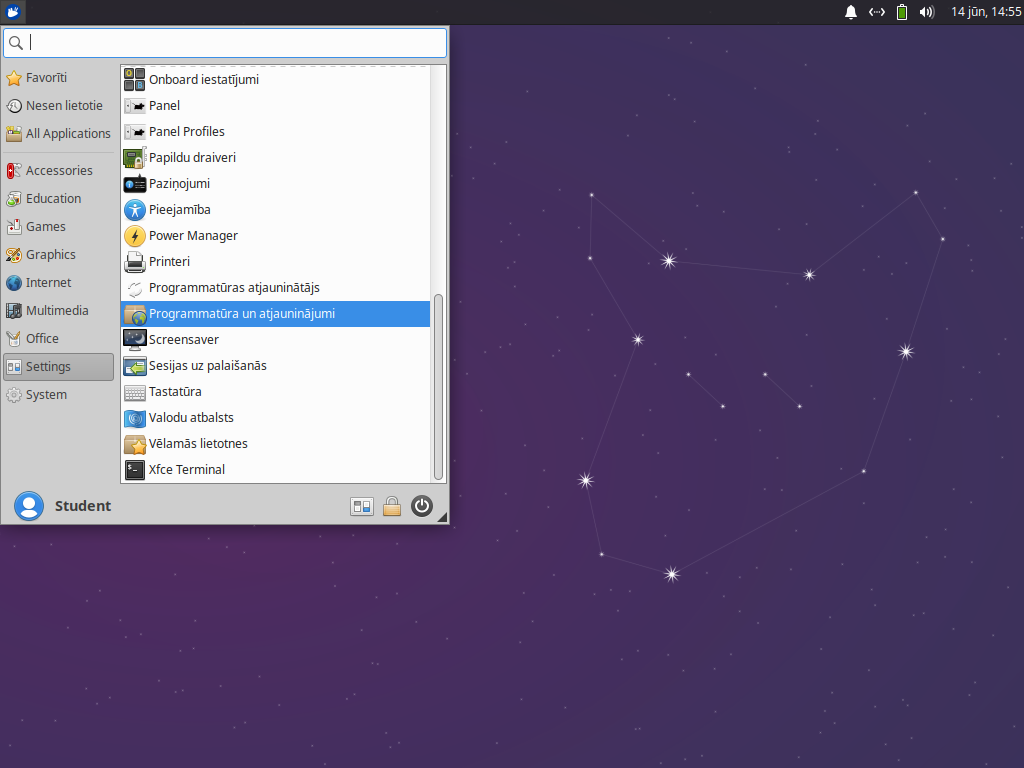
- Activate the start menu to Settings — Software & Updates:
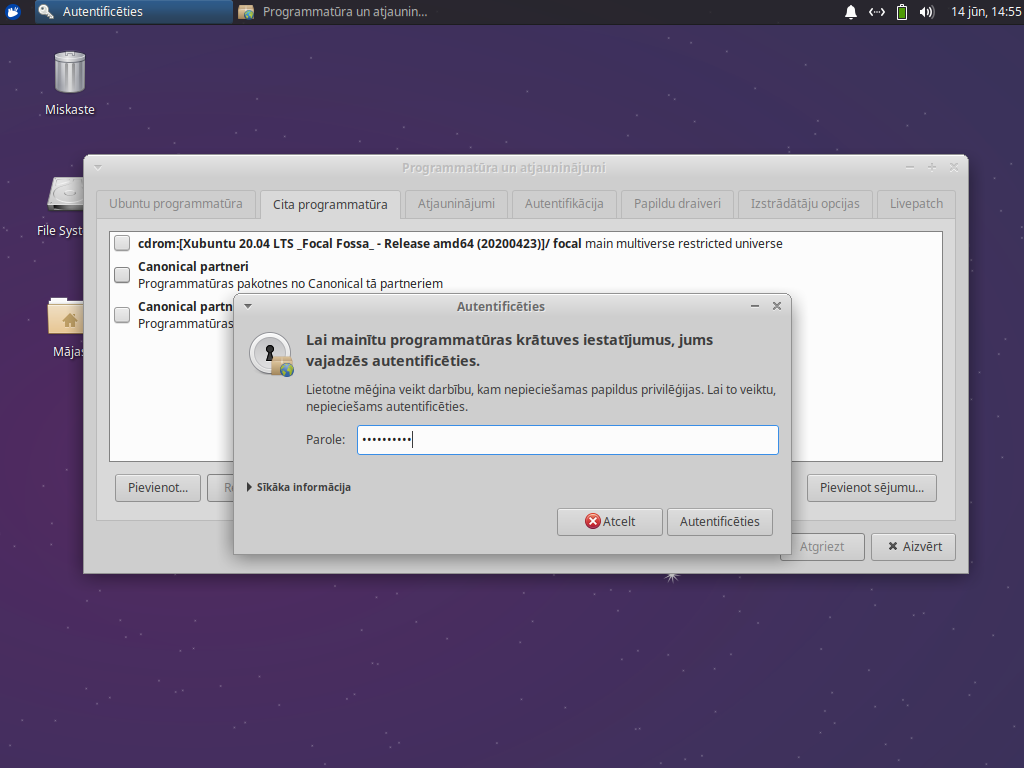
- If necessary, enter your password and click the Authenticate button
- In the Software & Updates window, open the Other Software tab and make sure that the repository is selected

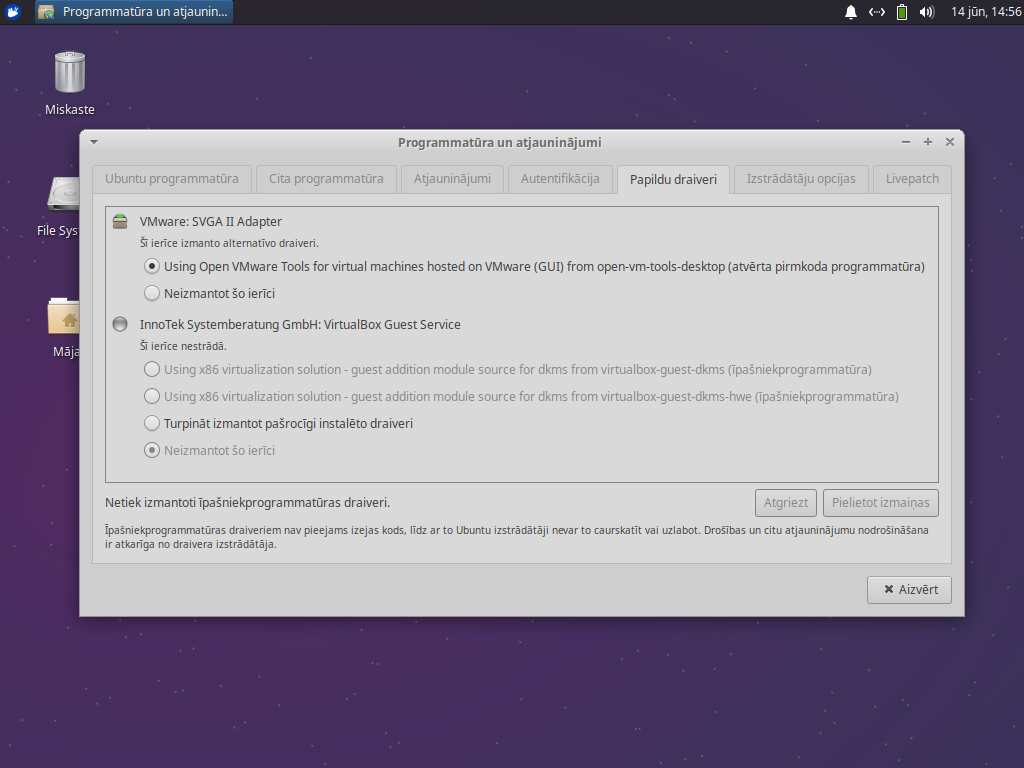
- Open the Additional Drivers tab
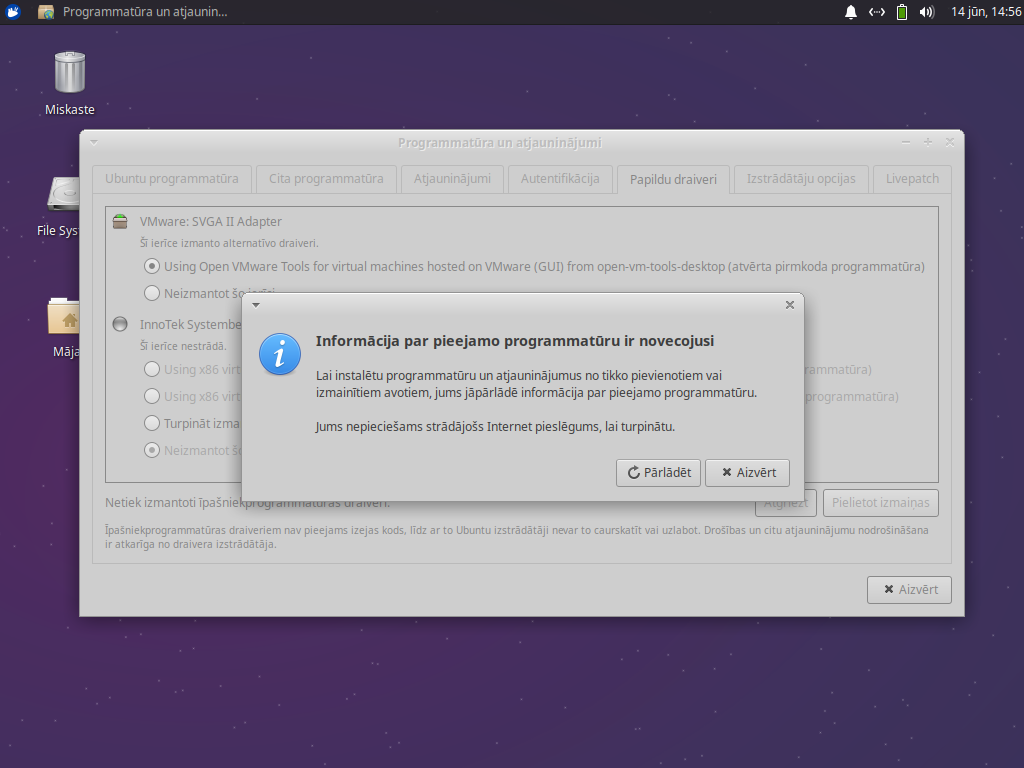
- If the computer is offered to use closed-source drivers, you can select them and click the Apply Changes button:
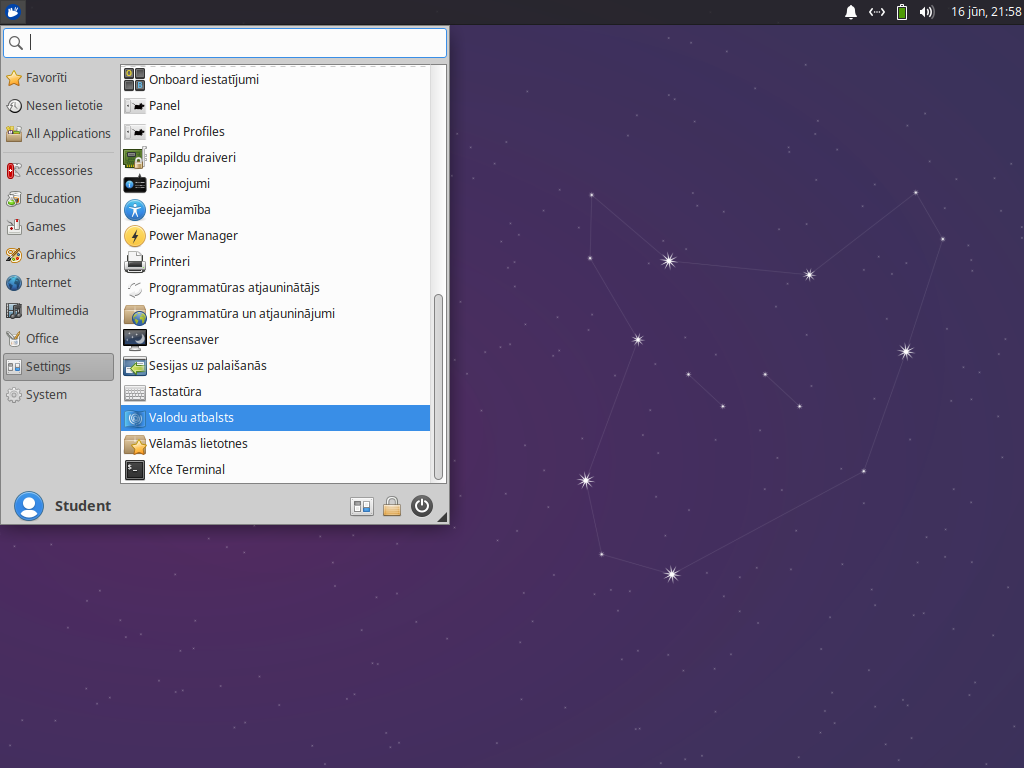
Additional languages support installation
- Activate the start menu Settings — Language support
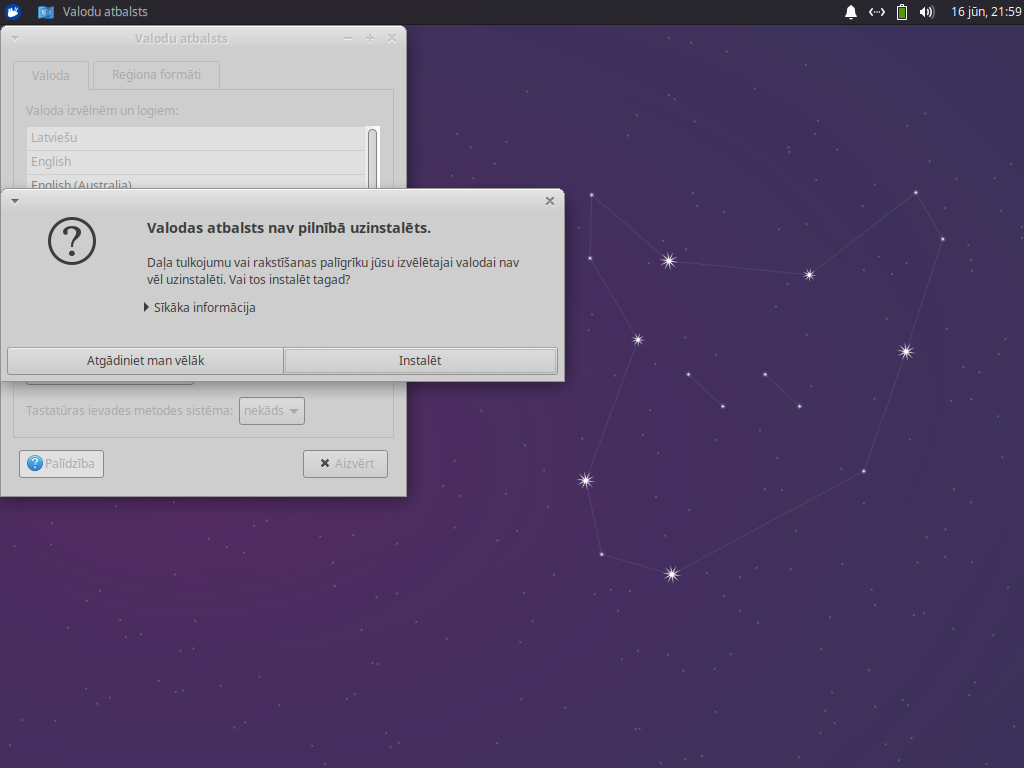
If necessary, check that Latvian language is installed
If necessary, add other languages and adjust Regional formats settings
Using LibreOffice office software
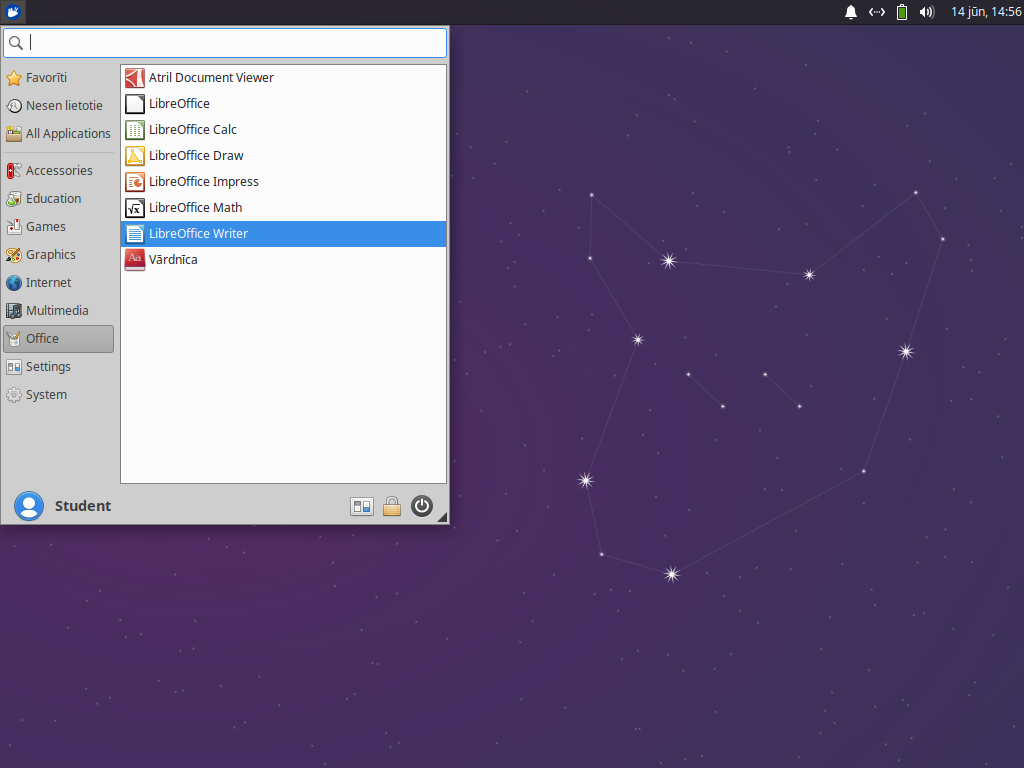
- To open LibreOffice office software, for example, a text editor, activate the start menu LibreOffice Writer
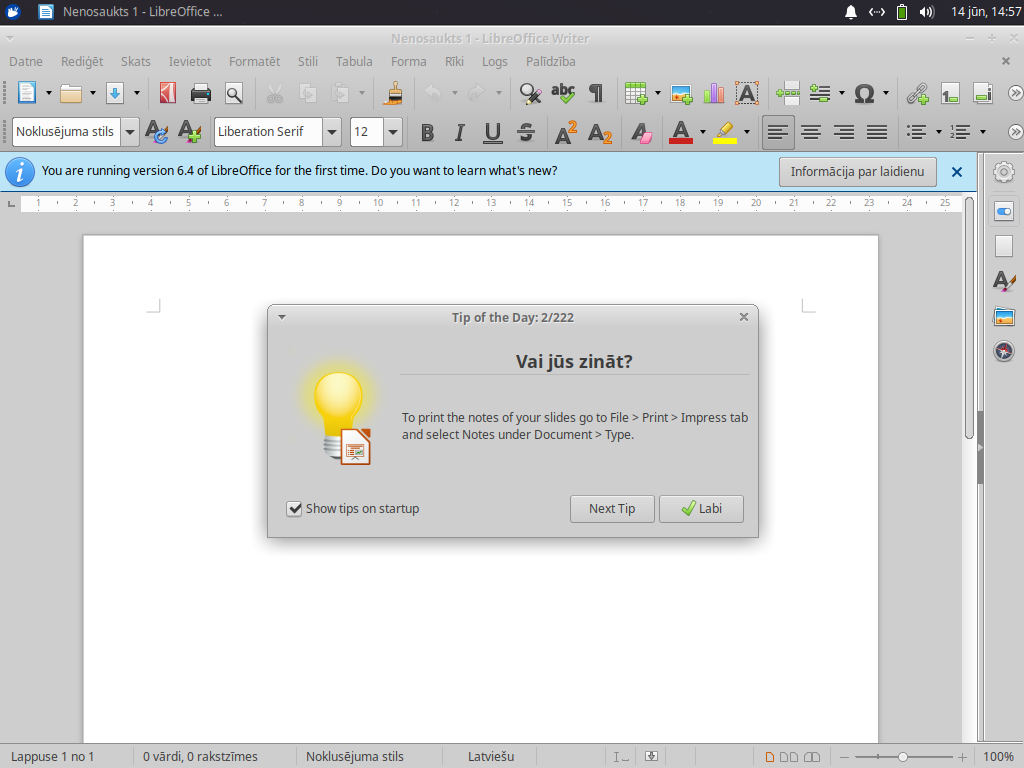
- If you are interested, click the Release information button. If not, click the × button next to it. If you are not interested in reading daily tips, clear the Show tips at startup check box and click the OK* button
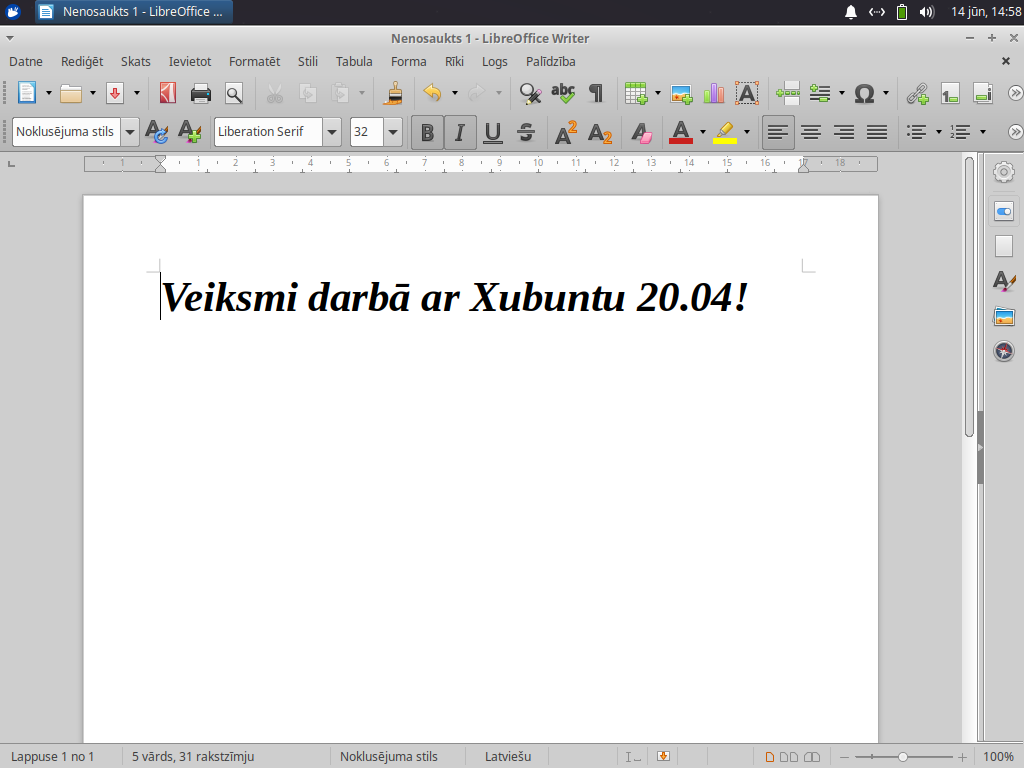
- Make sure that the document text is set to Latvian and the Automatically check spelling box is checked
- If so, congratulations, your computer is ready to work
Tags
Linux
Darbstacija
Uzstādīšana
Xubuntu
Created by Valdis Vītoliņš on 2026-02-03 22:11
Last modified by Valdis Vītoliņš on 2026-02-03 22:13
Created by Valdis Vītoliņš on 2026-02-03 22:11
Last modified by Valdis Vītoliņš on 2026-02-03 22:13


